



























































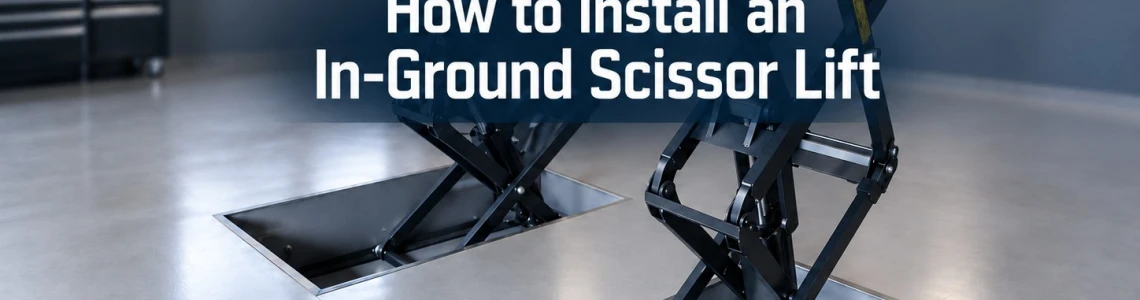
How to Install an In-Ground Scissor Lift in a Workshop or Garage
Practical Installation Guide
An in-ground scissor lift can provide a clean and space-efficient solution for vehicle servicing, but its installation requires much more preparation than a conventional surface-mounted lift. The lift must be considered as part of the workshop floor rather than as a separate piece of equipment installed after the workshop is finished.
The position of the lift, pit dimensions, concrete foundation, drainage, electrical connections and other services should all be planned before the floor is completed. Once the concrete has been poured, correcting an incorrectly positioned pit or changing underground connections can require significant additional construction work.
This guide follows a real BD-S4 in-ground double scissor lift installation, covering the main stages from planning and pit preparation to concrete work, lift installation and final testing. It also highlights several practical details that are easy to overlook during the initial workshop design.
The installation requirements shown here relate to the specific project and BD-S4 configuration. Exact dimensions and construction requirements should always be checked against the installation documentation for the particular lift being installed.
Why Proper Installation Planning Matters
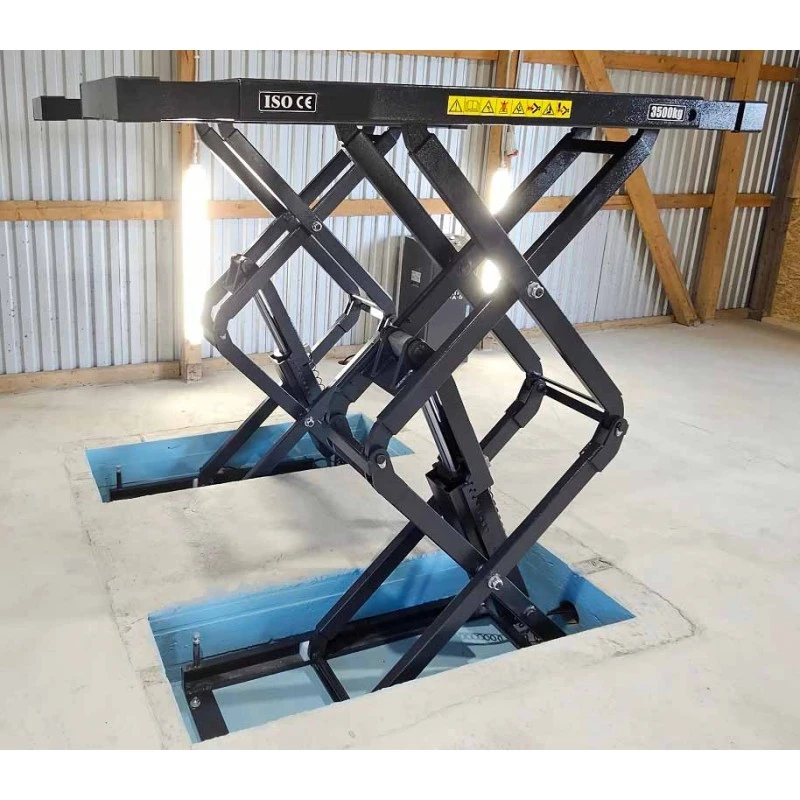
An in-ground scissor lift is installed into dedicated pits formed in the workshop floor. When the lift is fully lowered, its platforms and lifting mechanisms sit within the floor structure, leaving the working area more open compared with a conventional surface-mounted lift.
This makes an in-ground design particularly useful when workshop space needs to be used efficiently. However, the installation has to be planned before the floor is completed. The lift position, vehicle access, working space and the surrounding workshop layout all need to be considered together.
For a new workshop or a major renovation, the lift should ideally be selected before the concrete floor is constructed. This allows the required pits, foundation and underground connections to be incorporated into the building project from the beginning.
What to Check Before Starting Construction
Before excavation and concrete work begin, the complete installation area should be reviewed. The position of the lift is only one part of the planning process. The vehicle, technician and surrounding workshop equipment also need sufficient space.
Key points to check include:
- Vehicle entry direction and final parking position
- Distance from walls, doors and other workshop equipment
- Available working space around the vehicle
- Workshop ceiling height and the height of the lifted vehicle
- Beams, lighting, ventilation ducts and other overhead structures
- Pit dimensions, depth, spacing and diagonals
- Concrete foundation requirements
- Electrical and other service connections
- Drainage and liquid collection
- Protection of the pit edges
- Final floor height in relation to the lift platforms
1. Plan the Lift Position and Working Area
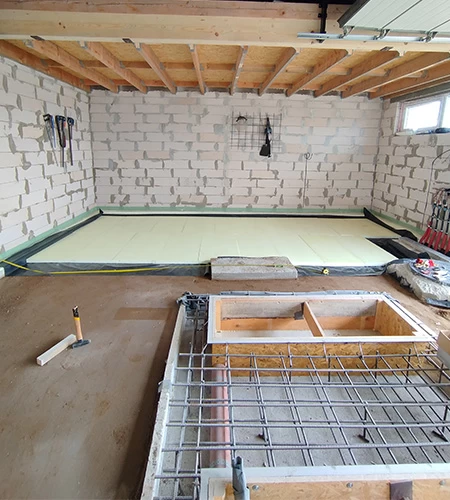
The first stage of an in-ground scissor lift installation is determining exactly where the vehicle and lift will be positioned. The entire working area should be considered rather than only the external dimensions of the lift.
Pay particular attention to the vehicle entry direction, distances to walls and workshop doors, the position of other equipment and the space required for technicians to work around the vehicle. It is also useful to allow additional working space at the front of the vehicle, where engine compartment and other service operations may require more room.
The height of the complete vehicle on the lift must also be considered. The maximum lifting height of the BD-S4 used in this project is 2030 mm, so the available ceiling height and any structures above the vehicle should be checked before the final lift position is established.
2. Prepare the Installation Pits
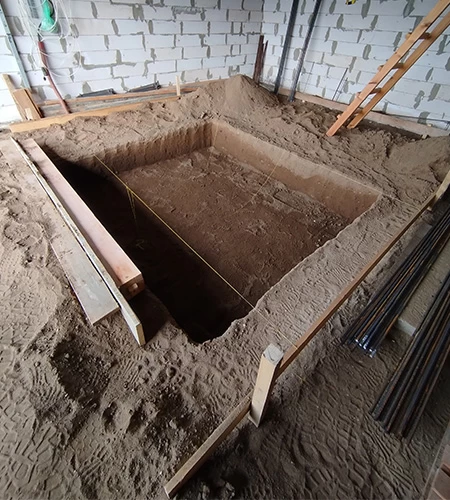
Once the lift position has been established, the floor can be prepared for the two separate pits required for the lifting mechanisms. According to the BD-S4 installation plan used in this project, the required recess is approximately 330 mm deep.
Accuracy is especially important at this stage. Before continuing with the construction, check the length, width and depth of both pits, the distance between them, their diagonals and the intended final floor height.
3. Plan Drainage and Liquid Collection
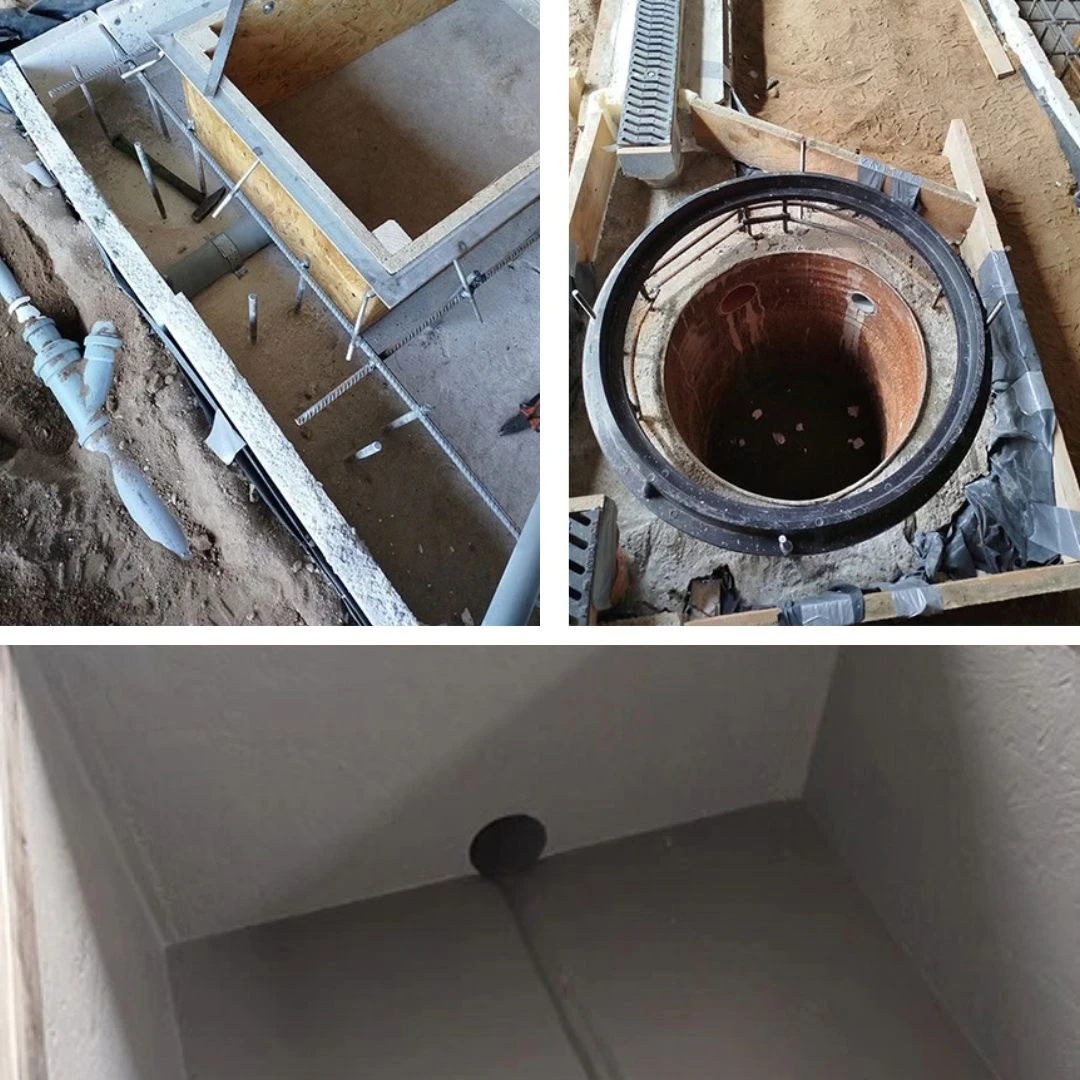
Drainage is one of the practical details that should be considered before the concrete work begins. Because the pits are below floor level, water and other liquids can collect inside them if no suitable drainage solution is provided.
During winter, vehicles entering a workshop can bring snow, ice, water, dirt and road salt onto the floor. As these materials melt, liquids can run towards the lowest areas of the workshop, including the lift pits.
The appropriate drainage and liquid management solution depends on the workshop, existing infrastructure and applicable local requirements. It should therefore be planned as part of the construction work rather than added after the lift has been installed.
4. Form the Pit Structure
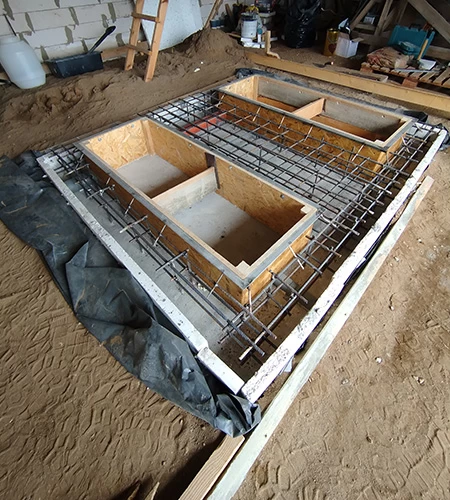
After the foundation and underground services have been prepared, the exact shape of the future pits can be formed. In this project, OSB and other construction elements were used to create the two openings into which the lifting mechanisms would later be installed.
At this stage, the final geometry of the lift installation is being established. Particular attention should be given to the upper level of the pits, as this determines how the fully lowered lift will align with the finished workshop floor.
5. Protect the Pit Edges
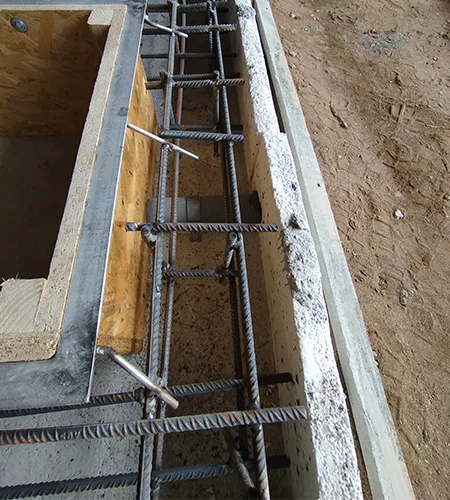
The edges of the pits are exposed to mechanical impact during construction and later workshop use. A metal edge profile can help protect the concrete from damage caused by equipment, tools or other objects hitting the edges.
Stainless steel is a practical option for workshop environments because the edges may be exposed to moisture, dirt and road salt brought in by vehicles. Protecting the concrete at this stage can help reduce chipping and deterioration around the pits during long-term use.
6. Reinforce the Concrete Foundation
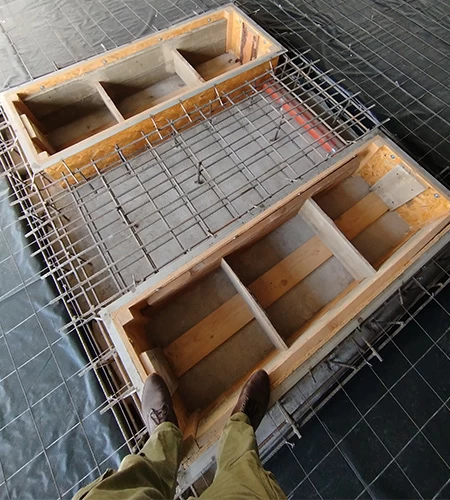
Once the pit structure has been formed, reinforcement and the concrete foundation can be prepared. The floor in the lift installation area must be designed to withstand the loads transferred during vehicle lifting and servicing.
For the BD-S4 installation shown in this guide, the concrete foundation beneath the lift area is specified at more than 200 mm thick. The concrete construction should always follow the requirements of the specific lift and the structural conditions of the building.
Before pouring the concrete, all electrical connections and other services leading to the lift and control unit should also be finalised. Access to these connections becomes much more difficult once the floor has been completed.
7. Pour and Finish the Workshop Floor
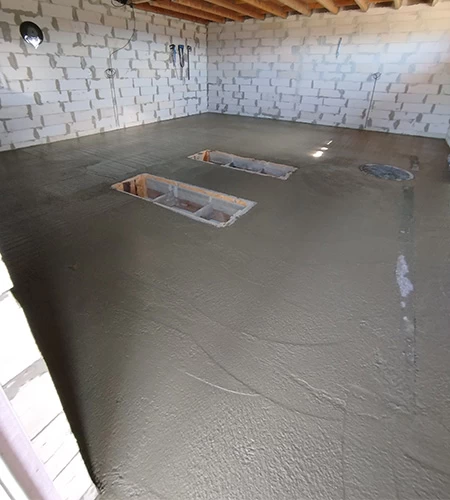
After the pits, reinforcement and underground connections have been prepared, the remaining floor structure can be concreted.
The finished concrete level must correspond correctly with the upper edges of the pits and the intended position of the lift platforms. Accurate measurements made during the earlier stages are essential at this point.
The aim is for the platforms to sit neatly within the workshop floor when the lift is fully lowered. This is one of the main practical advantages of an in-ground design, as the lift creates less obstruction in the working area when it is not in use.
8. Prepare the Pits Before Installing the Lift
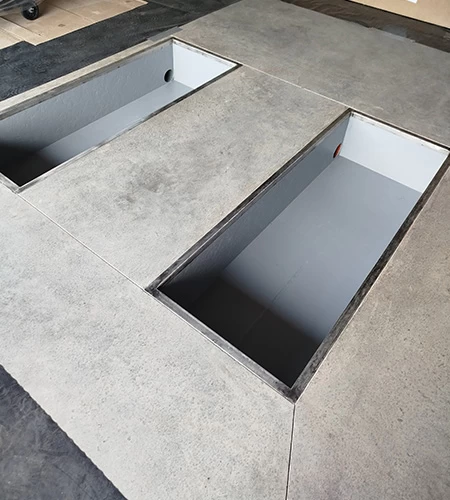
Once the concrete has reached the required condition, the pits can be prepared for the lifting mechanisms. This is the final opportunity to inspect the areas that will become difficult to access after installation.
The inside surfaces of the pits should be checked, the edges finished, service openings inspected and the liquid drainage system verified before the lifting equipment is placed into the pits.
Any necessary corrections should be completed before the lifting mechanisms are installed, as access becomes considerably more limited afterwards.
9. Install and Connect the Scissor Lift
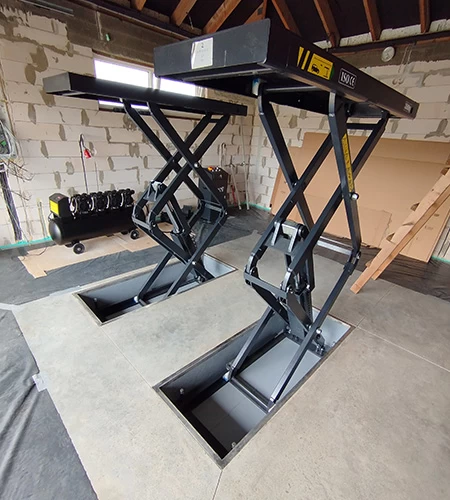
After all construction and preparation work has been completed, the two lifting mechanisms can be positioned inside the prepared pits. The control unit is installed separately, followed by the required hydraulic and electrical connections.
The BD-S4 uses an electro-hydraulic lifting system with hydraulic cylinder synchronisation and mechanical safety systems. Once the main components are installed and connected, the lift must be adjusted and its operation checked before it is used with a vehicle.
10. Final Checks and Testing
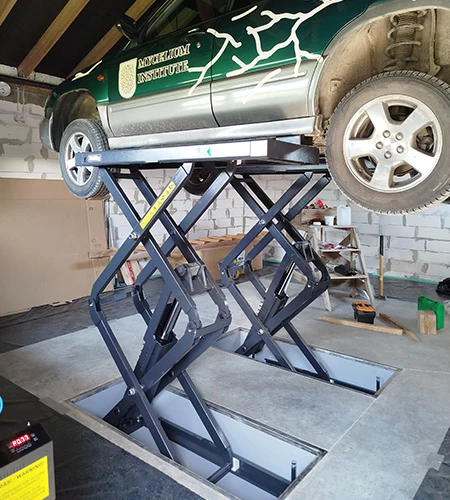
The final stage of the installation is to verify that the lift operates correctly and that both platforms remain properly aligned throughout their movement.
Before testing with a vehicle, check:
- Platform movement and lifting range
- Platform synchronisation
- Mechanical safety locks
- Final lowered position
- Platform alignment with the workshop floor
Only after these checks have been completed should the lift be tested with a vehicle. The final test confirms that the installation, adjustment and operating systems work together as intended.
What Remains Below the Workshop Floor?
The finished installation may look relatively simple, but a significant part of the work is hidden below the workshop floor. The completed system includes much more than the visible lifting platforms.
Below the floor are:
- Concrete foundation and reinforcement
- Underground electrical and other connections
- Liquid collection and drainage solutions
- Protected pit edges
- Precisely formed installation pits
- The lifting mechanisms and associated components
This is why an in-ground scissor lift installation should begin with proper workshop planning rather than with the lift itself. The construction, equipment and working area need to be considered as one installation project.
In-Ground or Surface-Mounted Scissor Lift?
The right installation approach depends on the workshop layout, building structure and planned use of the equipment. An in-ground scissor lift requires more preparation because the floor must be designed around the lift, while a surface-mounted model can generally be installed without creating dedicated pits.
An in-ground solution can be particularly suitable when a workshop is being newly constructed or substantially renovated. For an already finished workshop, the feasibility of excavation and concrete work should be assessed before selecting the installation method.
Key Points to Remember Before Installation
A successful in-ground scissor lift installation depends largely on the work completed before the lift arrives at the workshop. Before pouring the floor, make sure the following have been confirmed:
- The exact lift position and vehicle access direction
- Pit dimensions, depth and spacing
- Concrete foundation requirements
- Electrical and other underground connections
- Drainage and liquid collection
- Protection of the pit edges
- Final floor level and platform position
- Available ceiling height and overhead clearance
Planning these details in advance can help avoid complicated modifications after the concrete floor has been completed.
Planning an In-Ground Scissor Lift Installation?
If you are planning to install an in-ground scissor lift in a new workshop or renovate an existing service area, the installation requirements should be considered before construction begins. For the BD-S4 or other workshop lifting equipment, contact BalticDiag to discuss the required installation conditions and technical details.
The exact pit dimensions, foundation requirements and connections should always be confirmed using the installation documentation for the selected lift and the conditions of the specific workshop.
Explore in-ground and other scissor lifts for workshop applications: Scissor Lifts